UPDATE: If you are working in the new COS Page Editor and are working with one of our newer templates, there is a faster and easier way to switch out your images. You can find the documentation here.
The biggest trend in website design right now has to be the scrolling parallax template. This is a technique where a background image stays in the same location, or scrolls at a different relative speed, as the rest of the page scrolls. (For an example, check out the template we'll be using in this tutorial!)
As HubSpot Certified Design Partners, we have had the opportunity to take the HubSpot COS to the next level and include Parallax effects in our templates.
Since the parallax effect does require some CSS and HTML coding skills, it can be difficult for the average user to update their parallax and background images in the HubSpot COS. Below, we've put together a handy guide for how to update your parallax and background images in the HubSpot COS content editor. Check it out!
How to Change a Parallax Background Image in the HubSpot COS
**Before starting, open your Hubspot File Manager in another tab or window, and upload the image you wish to add as your new background. To avoid blurry backgrounds, be sure to choose a large image- at least 1000 px in width. The height may have to be adjusted as needed to get the parallax effect you're looking for. Leave this File Manager window open-- it will be necessary later in the tutorial.**
1. Open up your page in the content editor.
For this example, we will be using the same page that we created in our last tutorial, How to Update Basic Content in the HubSpot COS. This is based off our Inbound Responsive II template, which is available for purchase on the Hubspot Marketplace, and which features a scrolling parallax effect in the header. Here is what the website currently looks like:

Enter the HubSpot content editor. At the bottom of the page you will see some options. Click "Actions" > "Edit Template Layout." If you are prompted to clone your file, do so to avoid changing any additional pages by accident. Just add a template name and choose a folder to place it in.

2. You've now entered the Template Editor.
It should appear as below:
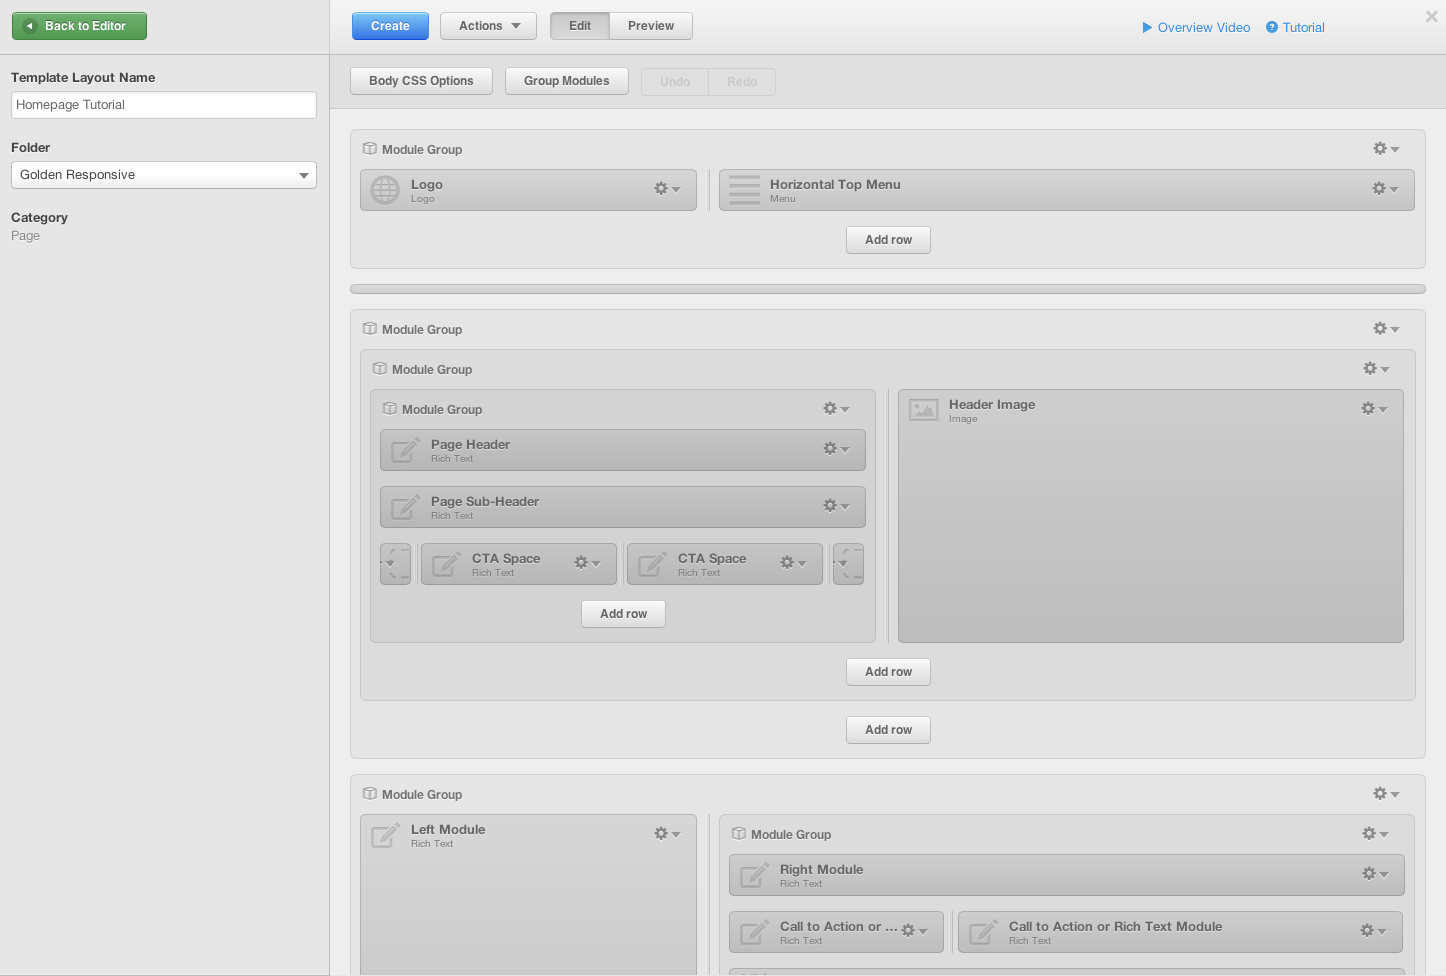
All those gray boxes are the modules and groups that make up your web page. It may look overwhelming at first, but changing your background image is actually very simple. Do you see how the section featuring "Page Header," "Page Sub-header," "Header Image," and the like are all contained within a few gray Module Groups which wrap around them? To change your background image, go to the outermost group and click the little gear icon on it. Then choose "Edit CSS Declarations."
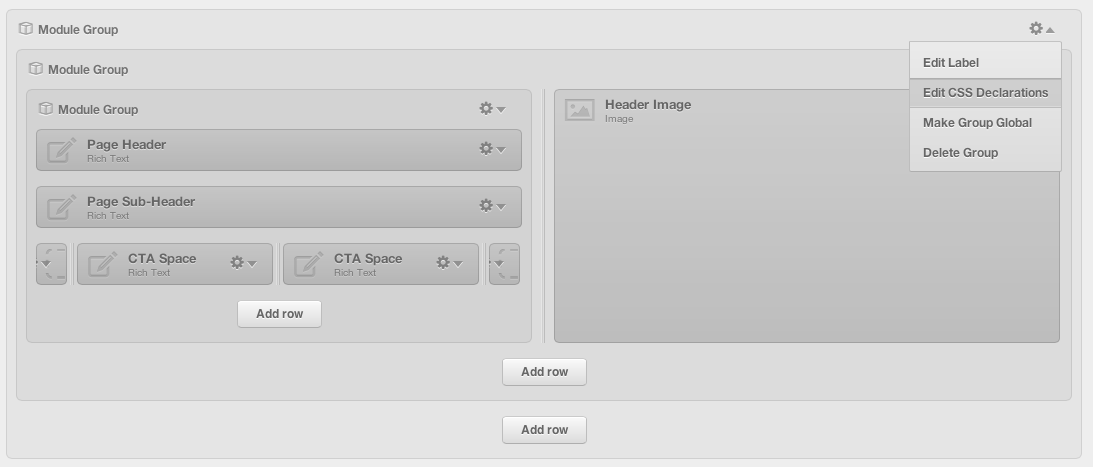
This will bring you to the screen you see below:
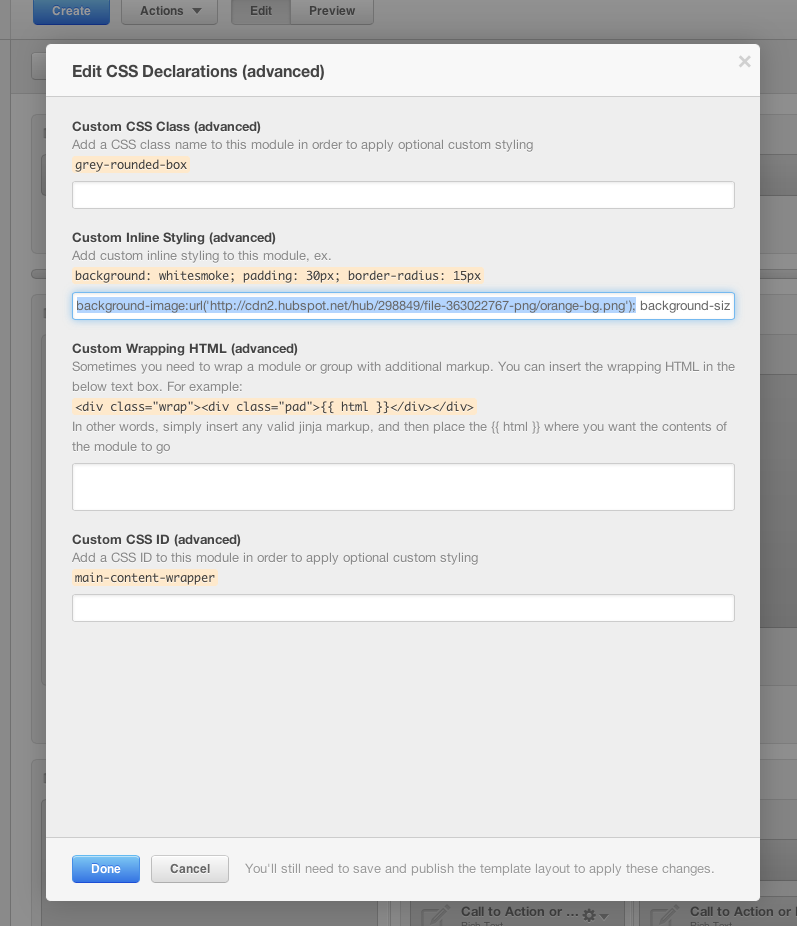
3. Change your background image within the CSS.
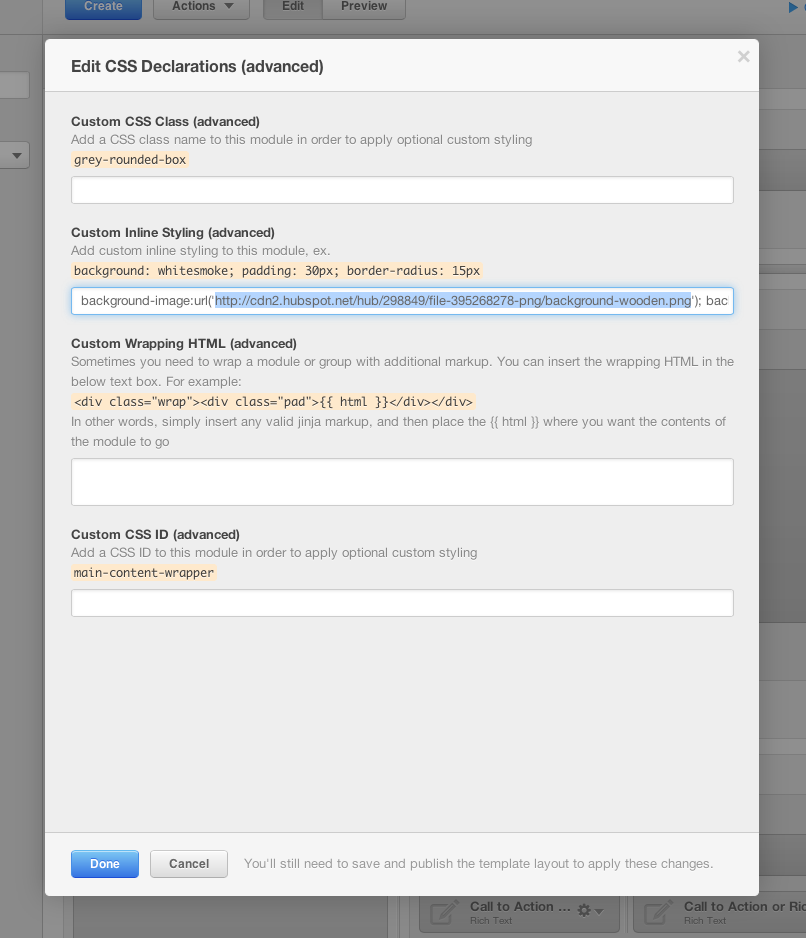
You can see above that I have highlighted the code we will be working with. It is in the following format:
background-image:url('your image code will go here');
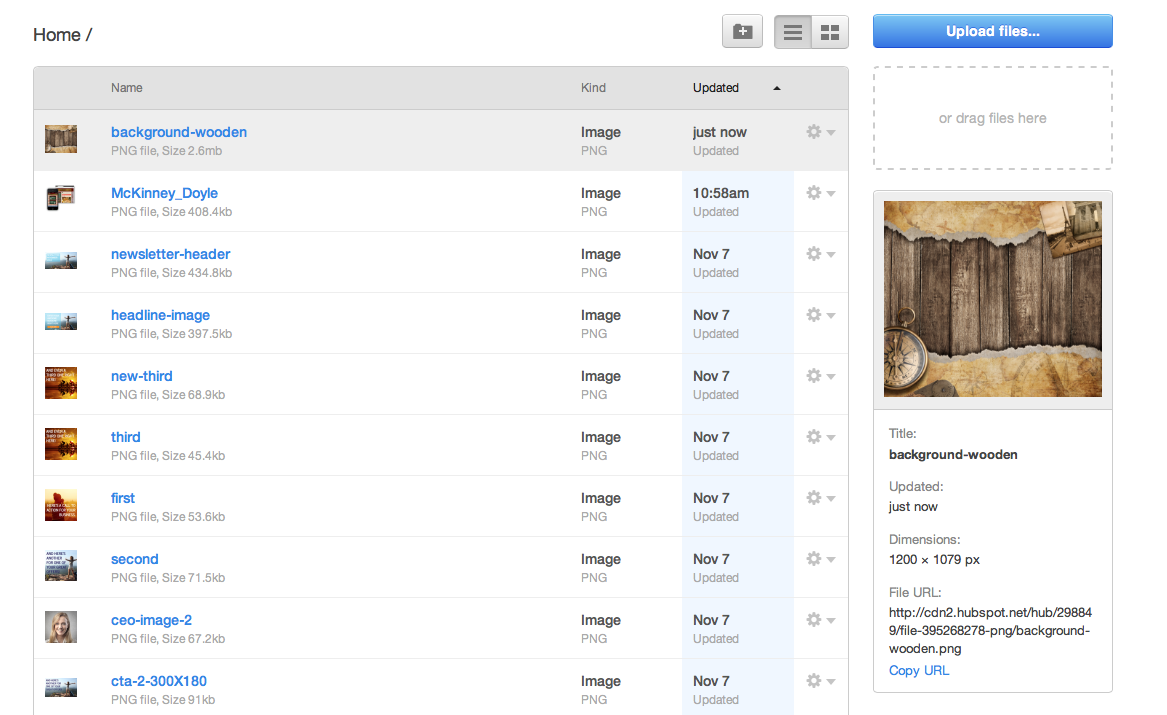
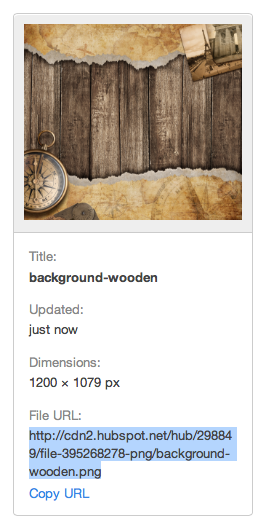
This is the code which determines what your background image will be. Recall earlier uploading your new image to the file manager and leaving that window open in the background? Now is the time to access that page again. Click on the image you wish to use, and you will see it has its own special URL identification listed beneath it. Copy that entire code, and paste it where the old code is located in the CSS editor. See below:
4. Finish up the process.
Choose "Done" in the CSS editor. Then "Create" or "Update" your template, and click the green button to the upper left to return to your Content Editor dashboard.
You will notice that, especially if adjusting a parallax background, the Content Editor shows the image as blurry and stretched. This is only visible inside the editor- to see how your new background really looks, publish your page and view the live link. You should see your new background live and visible on your website!

Congratulations! You've now updated your very own parallax background on your website! Wasn't that easy? By editing some simple CSS code, you can create a completely unique website that's all your own.


