Our templates are made exclusively for HubSpot.
In order to purchase and use our template packs you need an active HubSpot account.
If you're new to HubSpot, we suggest familiarizing yourself with the platform before purchasing a template pack.
HubSpot isn't difficult to use, but as with any software, there is a learning curve.
HubSpot provides helpful resourcesfor learning more about the process of building a website using the HubSpot platform.
Reading through the rest of our documentation will help to give a broad overview of the things you need to know before jumping into using a template pack.
You will only need coding experience to use one of our template packs if you are looking to make drastic layout changes or design updates to the existing templates.
You will not need any experience coding to change any of the following elements in the template pack:
Any full pack purchase comes with a free setup of your template pack with your brand's colors, styles, headers, and footers.
Our team is responsive and happy to answer post-purchase questions regarding template functionality.
Our template packs are very flexible, and our team of developers are able to create highly customized websites that start with a template pack. Ask us about creating a custom site using one of our template packs.
Once you purchase a template pack, the templates are added to your HubSpot account so that you can begin to use them.
Your templates can be found in the Design Manager.
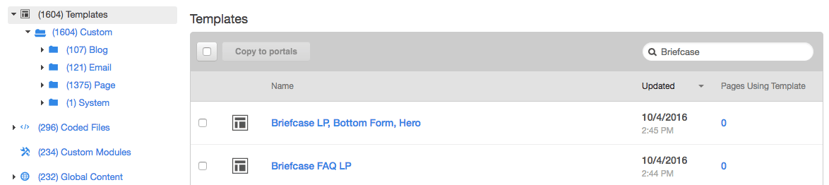
The best way to find your new templates is to search for them by name using the search bar, or using the sidebar on the left hand side to browse through your folders to find them.
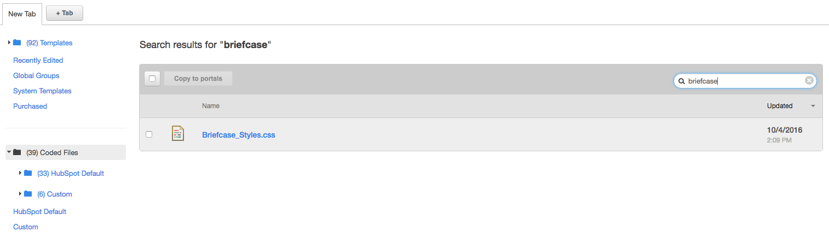
You can find the stylesheet of your pack under the "Coded Files" category of your design manager which can be found in the sidebar on the lefthand side.

You can search for the name of your template pack under the "Coded Files" category to find your stylesheet.
To insure that the original template pack stays intact, HubSpot doesn’t allow you to make any changes to the original templates or oroginal stylesheet.
In order to use the templates and make updates to the styles, you will first need to clone the stylesheet and any templates that you are planning to use.
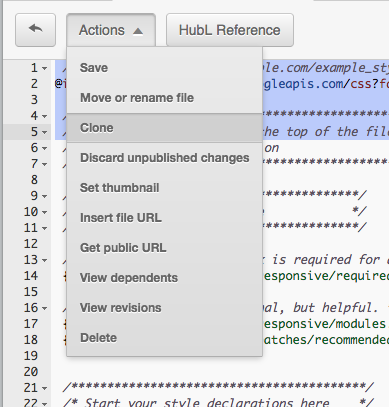
In order to clone the stylesheet, you will have to open it in your HubSpot design manager.
Search in the "Coded Files" category on the left sidebar to find your template's stylesheet.

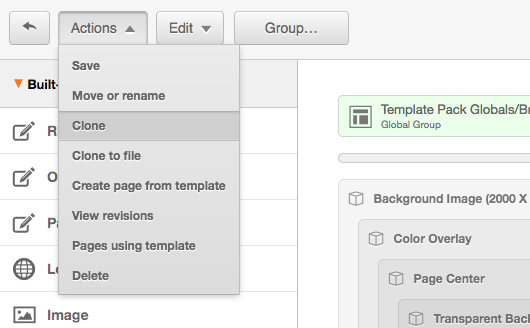
Open the stylesheet, then click on the "Actions" button in the top left corner, and then click "Clone" in the dropdown menu.
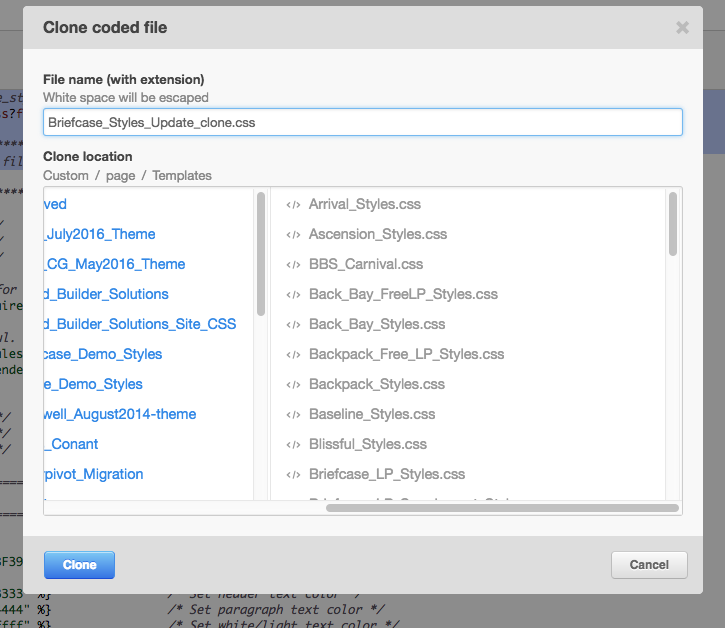
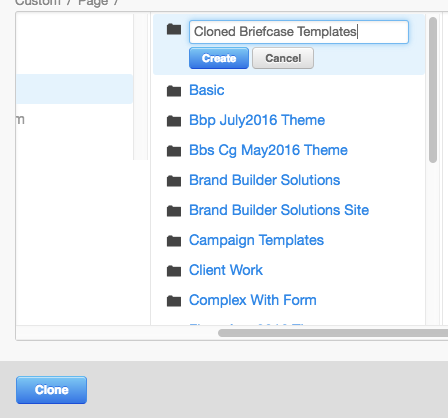
Give the new stylesheet a name and then press on the clone button in the bottom left corner.
Once you've cloned the stylesheet, you can begin to clone the templates and attach the newly cloned stylesheet.
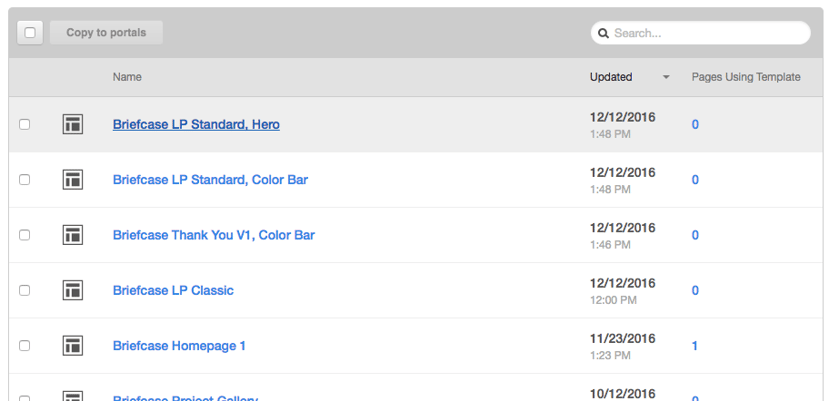
To do this, find the folder that contains the pack's templates, and open the first template. (You can search for the templates under the "Templates" category on the left sidebar.)
Click on the "Actions" button in the top left corner and click on "Clone" in the dropdown.
You will want to create a new folder in your design manager to keep all of your cloned templates so they are organized seperately from the originals.
After cloning the template, you can click on the "Edit" button in the top left corner of the cloned template, and then click on "Edit Head" in the dropdown.

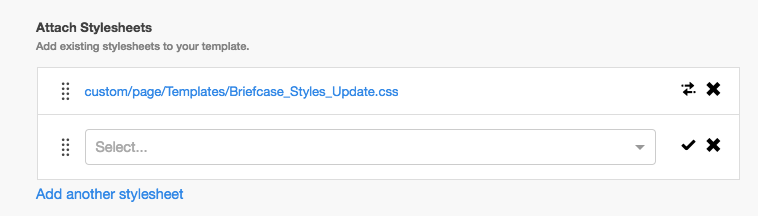
You can then swap in the newly cloned stylesheet. Press the "Add another stylesheet" link in the "Attach Stylesheets" section, add the cloned stylesheet, and removing the original.
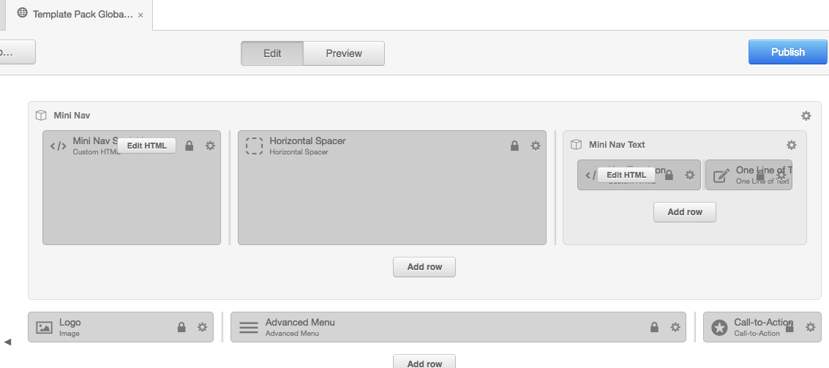
A global header and footer is attached to every template in the template pack, allowing you to update the logo, menu, and any other elements in the header and footer throughout the entire template pack.
To update your pack's site page global header and footer, open one of the homepage templates in the design manager and press on the "edit global group" option under the gear of the global header or footer module.
Header Module Group:

Footer Module Group:
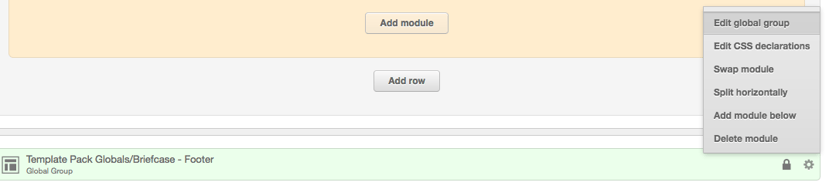
Once you click on "edit glibal group", a new tab will be opened that allows you to edit the modules within the global group (as shown below).
Site page templates and landing page templates use different global headers and footers, so you will have to follow the same steps as above using a landing page template to modify the landing page global header and footer.
You can update the menu by creating a menu in the "content settings" of your HubSpot portal.
HubSpot provides thorough documentation on setting up your menu.
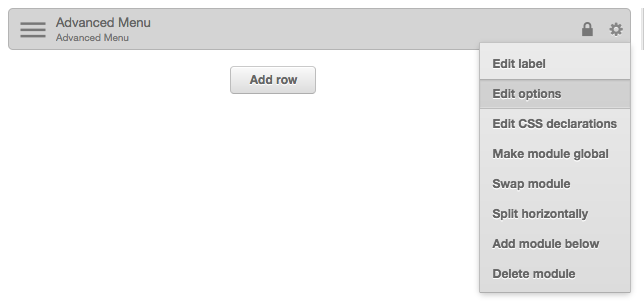
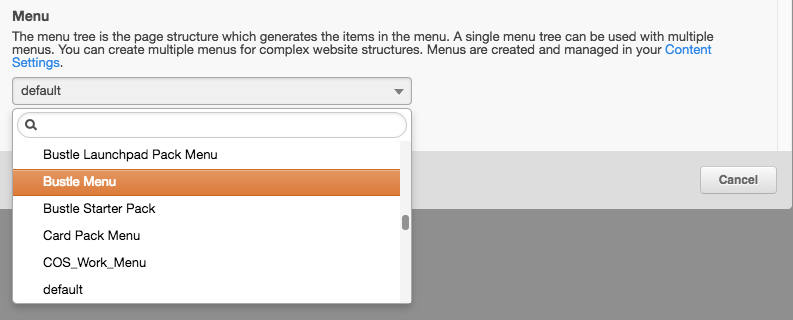
Once you have set up your menu, you need to select the appropriate menu to use by editing the "advanced menu" module in your global header.
Click on the "Edit Options" in the drop down, and then select the correct menu to use.
Open a homepage template from the template pack that your purchased in your design manager.
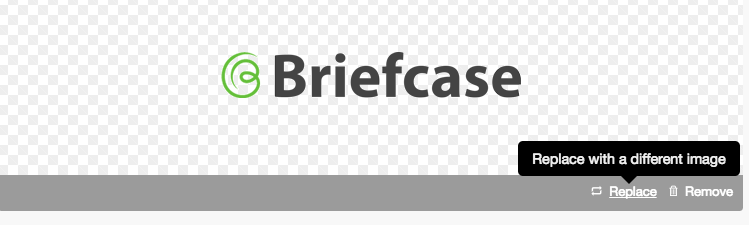
You can update the logo in your global header and footer by editing the "logo" module in your header / footer and replacing the existing logo with the correct logo image from your HubSpot file manager.

A HubSpot template is the basic layout / outline that you use to create a site page.
The template / design manager is not the place where you should update content or images.
A site page is created by selecting a template from your design manager and then using the HubSpot Page Editor to replace content and images.
To create a site page, first go to the "Content" tab in your HubSpot Portal's navigation.
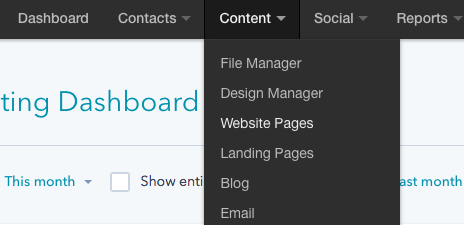
Press on the "Website Pages" option in the drop down.
Click on the "Create a new website page" in the top right corner.
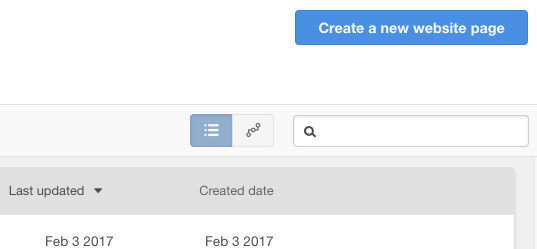
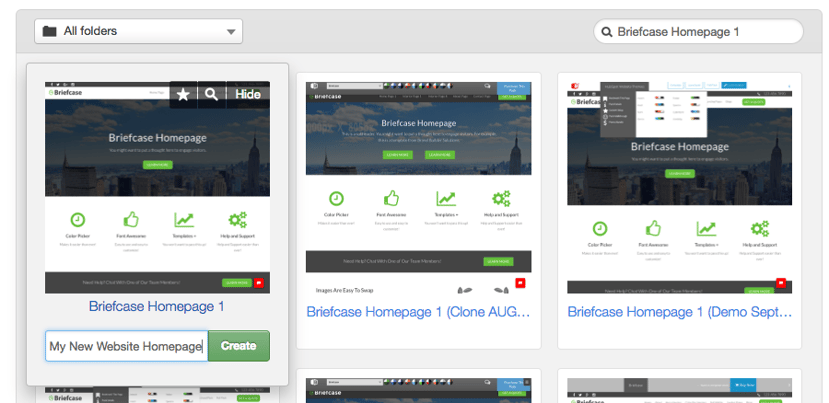
Search for the template you want to use from your design manager and then name the page.
Once you've created a site page, you can use the page editor the update content within the modules on the page.
Update images and text by selecting in the page editor and replacing them with your own content.
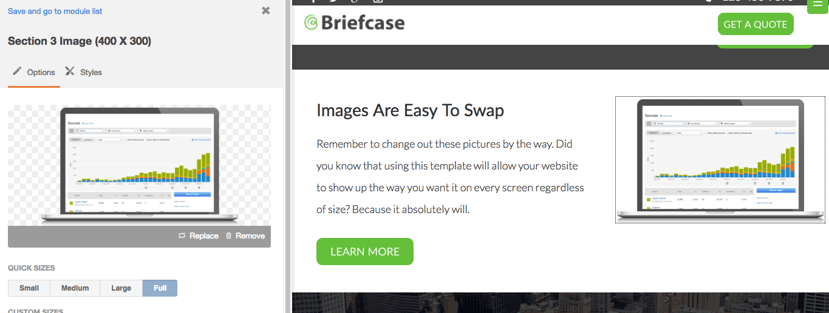
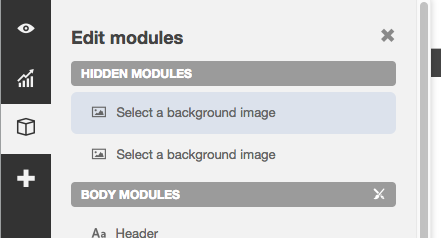
You can select the "Edit modules" tab on the left sidebar to reveal other hidden options such as swapping out banner background images.
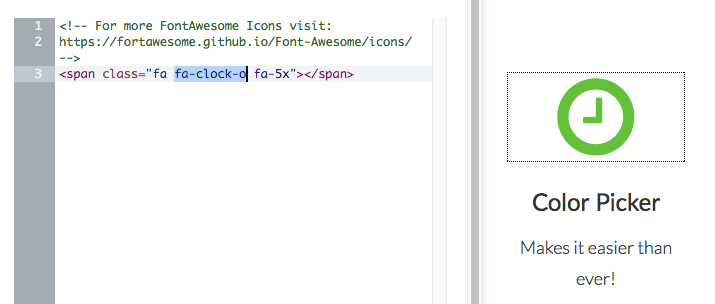
The icon set used in our packs is called "FontAwesome" which gives you access to a library of 600+ icons for free.
You can see documentation for using font awesome on their website.
To use font awesome with out pack, simply switch the class name to match the name of the icon you are looking to use.
Any full pack purchase comes with a free setup of your template pack with your brand's colors, styles, headers, and footers.
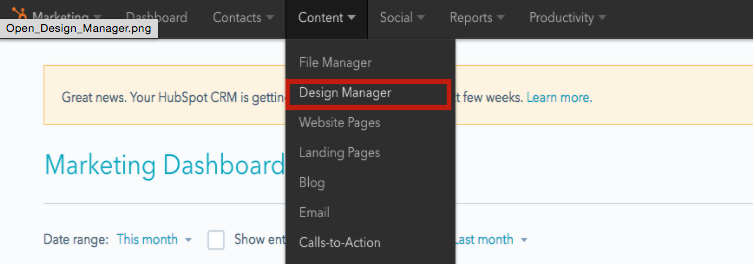
Log into your HubSpot Marketing account. Click the "Content" drop down in the top level menu to open the Design Manager.

Click on the "Coded Files" folder in the sidebar and search for the template pack stylesheet. Click on the CSS file that shows up. You will have to edit the font in the clone of the stylesheet, not in the original.
Find a google font that you would like to use, and copy the import link to put into the stylesheet.
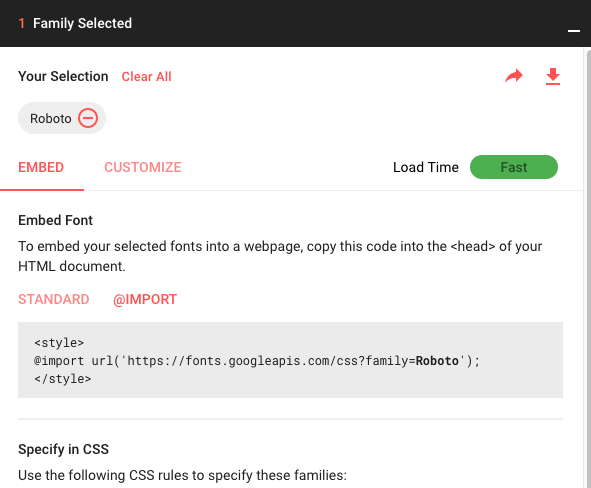
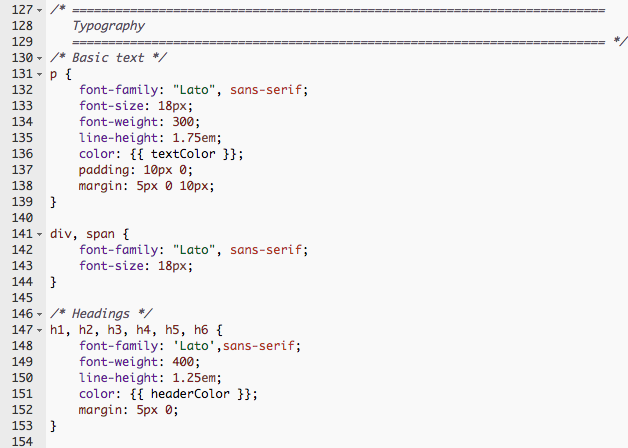
Import the new font into your stylesheet. On line 2 you will see the current imported font. You can put the new font import below the old one.Scroll down to the "Typography" section of your stylesheet. (Starts around line 130)

Replace the old font-family with the new one that you've imported.
In the example below you would replace the old font family, "Lato", with the new font family, "Roboto".
Log into your HubSpot Marketing account. Click the "Content" drop down in the top level menu to open the Design Manager.
Click on the "Coded Files" folder in the sidebar and search for your templates stylesheet. Click on the CSS file that shows up. You will have to edit the colors in the clone of the stylesheet, not in the original.

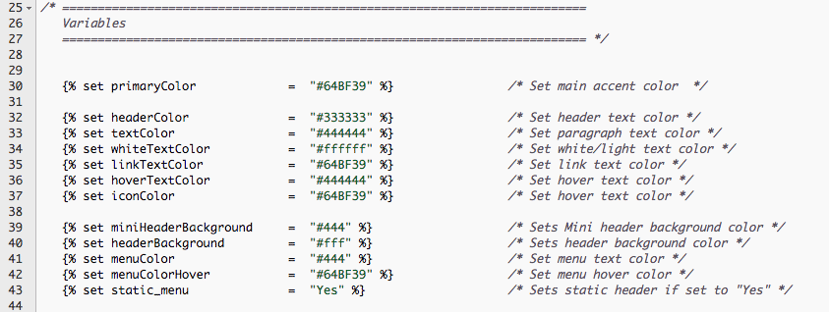
Scroll down to line 26 of your stylesheet to find editable color variables. On the right side of the stylesheet you can see a description of the style that each variable effects. Update the hex codes to fit your own brands styles.
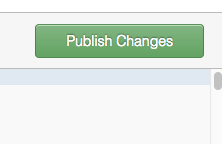
Click the "Publish" button in the top right corner of the stylesheet
The style updates you have made with your brand colors will render across all templates in your pack you purchased.

