It is now 2016 and this statement continues to be true - for any business, your website is one of your most important assets.
Your website is the face of your company and the first place consumers and businesses will turn to find information, products, or services. If you don’t have a compelling website that clearly explains what you do, success may be hard to come by. Even though all companies need a website, it does not mean that they are all the same.
If you already know us, you know that we make websites for Inbound Marketing. Most of them are pretty advanced and are made with WordPress or HubSpot. You maybe asking then why write about Wix?
I'm on a few calls a month with people asking to pay me $5,000 to make a website. But they have no plan and no experience, so this article is for you if you are just getting started.
If you are just starting a new business investing heavily in web design at such an early stage can end up causing more problems than it solves.
Thankfully, there are now Content Management Systems (CMS) which are designed to let you build your own website without needing to learn the ins and outs of coding. One of these options that we would recommend for its simple to use drag and drop functionality is Wix.
Wix is a free platform that even comes with templates to choose from based on your industry so you can gain a head start. Below is a step by step walkthrough on how to get started with Wix, complete with documentation and tutorial links.
Step 1: Sign up for Wix

Wix offers a Free option for you to start with that can be upgraded at any time to one of their Premium Plans for more features or bandwidth (here is documentation on upgrading and some coupon codes for discounts).
Step 2: Find a Template
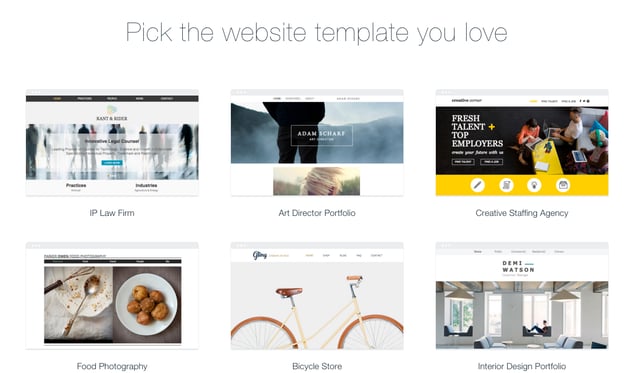
There are hundreds of pre-built templates you can fill with your own content, images, and videos. Review the template collection and search for a template that suits your business and industry. From the template collection you can view and select templates to add them to your Wix account.
Step 3: Familiarize Yourself with the Wix Editor
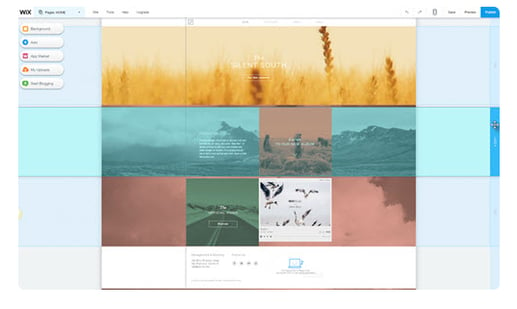
Once you select a template to use and click Edit, you will be taken into the easy to use Wix Editor where you can update the template with your own content. Here is a quick explanation of how to use the top bar of the Editor and here is another for the sidebar on the left that allows you size and position the different elements of your site.
Step 4: Modify Your Template and Add Content
Each page is broken up into different sections, which you can drag and drop to change the page layout. To add new elements to the page, click Add in the left hand sidebar.

Here are some more advanced editing video tutorials if you are looking to do more with your site. If you end up having difficulty with anything while updating your new site, chances are a quick search in the Support section will provide a step by step answer to your question.
Step 5: Save, Preview and Publish Your Site
As you are building new elements and adding content, you should be saving your progress fairly frequently. In order to do that, simply click Save in the top right corner.
When you are satisfied with your work you should preview your site and test it before making it live. This way you can fix any issues before they reach the visitor.
When you are ready to publish your site, simply click Publish in the top right corner. It is important to remember that none of the changes you have made to the site will show up on the live pages until you hit this button. This is true for the first time you publish it and for any changes you make to the pages after they are live.
Step 6: Updating Site After Publishing
As your company progresses, you will want to continually update the website to add and showcase new content. To edit your site after it has been published, simply log in to your Wix account. You will see an image of your site with a button that says “Edit Site”. Clicking this button will bring you back into the editor where you will follow the same process as you did before. Again, no edits or updates will be live on the site until you click the Publish button
The Wix editor is pretty simple to use once you get the hang of it. No coding experience is required to drag, drop, and edit everything with the click of a mouse. For a more thorough visual tutorial of the nuances of the editor, here is a 90 minute video walking you through each aspect of it.


